Monitor Changes to Form Results
Submit any form and detect changes to the results page with Fluxguard. Click checkboxes, fill in text areas, select from pull-downs, and more.
To monitor password-protected content, learn how to orchestrate simple logins.
1. Add the URL where the login occurs in Fluxguard
If you haven’t already done so, add the site and page where the login occurs.
Add a new page to an existing site by clicking its Session View. There, select the add button and input the URL:

2. Perform an initial crawl of the login page to get a pre-logged-in version
To use Visual Selectors, manually initiate a crawl of this page. To do so, on its Session View, click the play button:

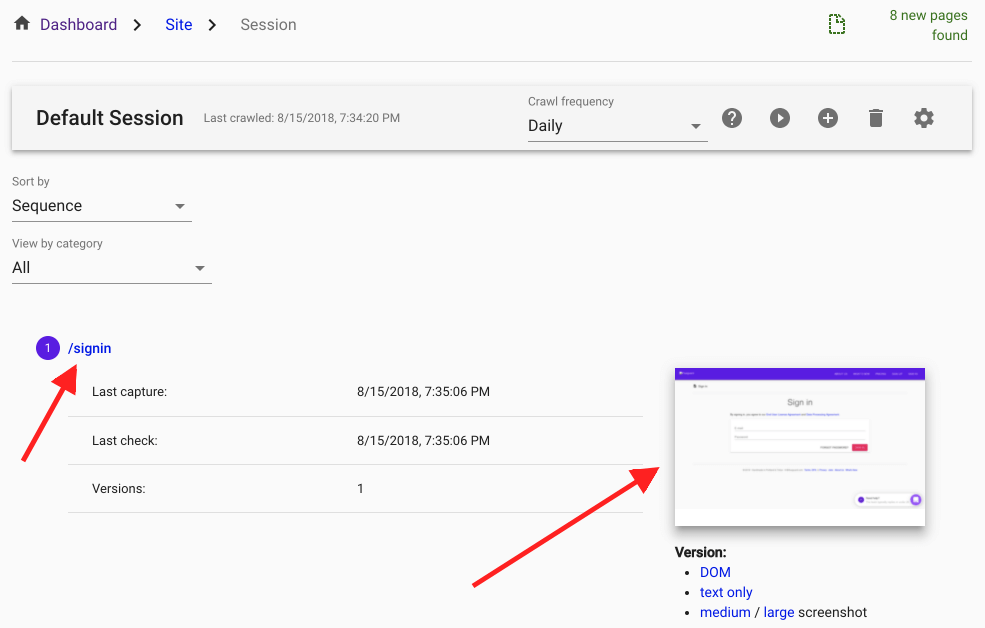
The results of the crawl will display in a moment. This will include a screenshot of the pre-logged in version, DOM, and text captures:
3. Click into Page View
Click the URL to go into Page View. In the screenshot above, the arrow on the left points to the link.
Following that, you will be in Page View where all prior capture data can be accessed. This is where adding actions such as form submissions are possible.
4. Click the Add button to include a new action
Click the “Add” button:
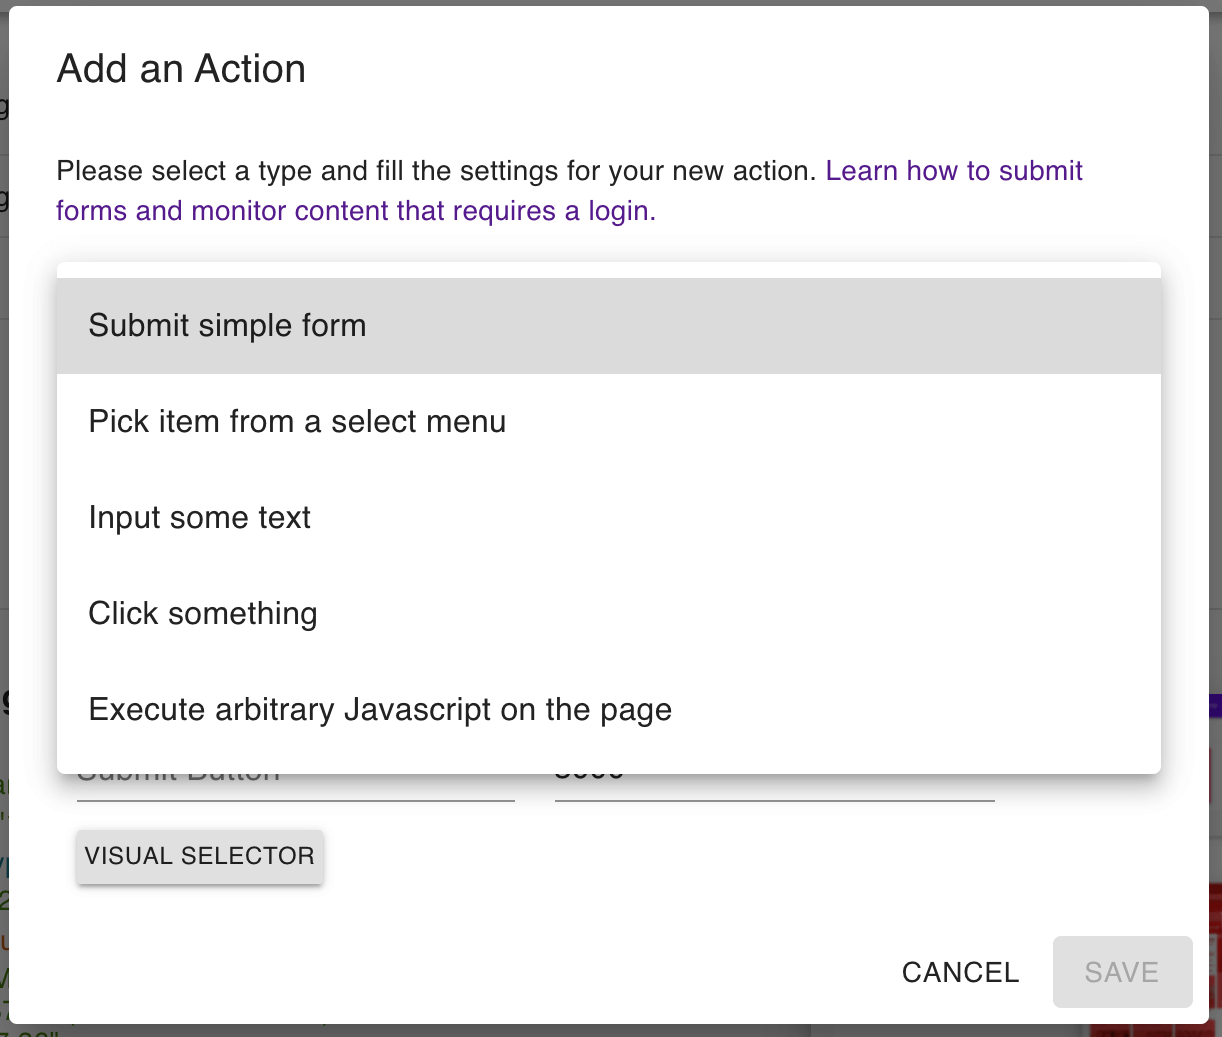
This will bring up a modal to implement various actions related to form submission:
If the form consists only of text areas and a submit button, use the “simple form” option as a shortcut.
However, if the form requires multiple actions – for instance, picking an item from a drop-down, selecting a checkbox or radio button, and so on – it is necessary to incorporate a combination of actions:
- Use “input some text” to enter text to text fields
- Use “pick from a select menu” to select an item from a drop-down menu
- Use “click something” to click radio buttons, checkboxes, and, at last, the form submit button itself
5. Understand how to fill out the form in Fluxguard
Every form action includes a CSS selector that identifies the area to manipulate. Depending on the form, additional options will appear.
- Select: enter a value. To do this, use the
valuefield present in theoptiontag. - Click: enter a millisecond time delay; this instructs Fluxguard to pause after performing the click and before doing anything else: this is useful if the click results in a form submission.
- Input: specify the text to enter.
6. Input the CSS selector to identify the form area
The CSS selector is key for every Fluxguard action. This is an identifier for the item to manipulate. If you’re familiar with DOM and basic HTML, this should be straightforward.
CSS selectors are special instructions browsers utilize to identify an area of a web page. They can look a bit intimidating, but they’re quite simple. For example:
#elementidentifies an element by its id.elementidentifies an element by its classdiv > div > div > div > aidentifies an element by its hierarchical location in a document
Fluxguard utilizes CSS selectors to filter areas to ignore or focus on. This is a powerful technique to isolate the content you wish to monitor, while ignoring frequently changing areas that introduce false-positive change alerts.
It is possible to discover the CSS selector for any area of a page in 2 ways:
- Use the Visual Selector to find a CSS selector. Click on the button next to the first field in the modal to open the Visual Selector. This will use the most recently captured version of the page (so, make sure you’ve done an initial crawl before using it on any given page). It will open this page in a new browser, and prompt you to identify the areas to filter.
- This powerful feature renders the target site through our API as a means to identify DOM areas. As such, it may not work on every web page. Please let us know if you encounter a page where it does not seem to work well. In the meantime, try the alternative method detailed below. (In fact, the approach below is the one we use as it allows for more flexibility in selector creation.)
- Use Google Chrome to identify a CSS selector. This requires only minimal HTML knowledge, so you can often do this yourself.
- Using Google Chrome (or another modern browser).
- Go to the live page with the area you wish to filter.
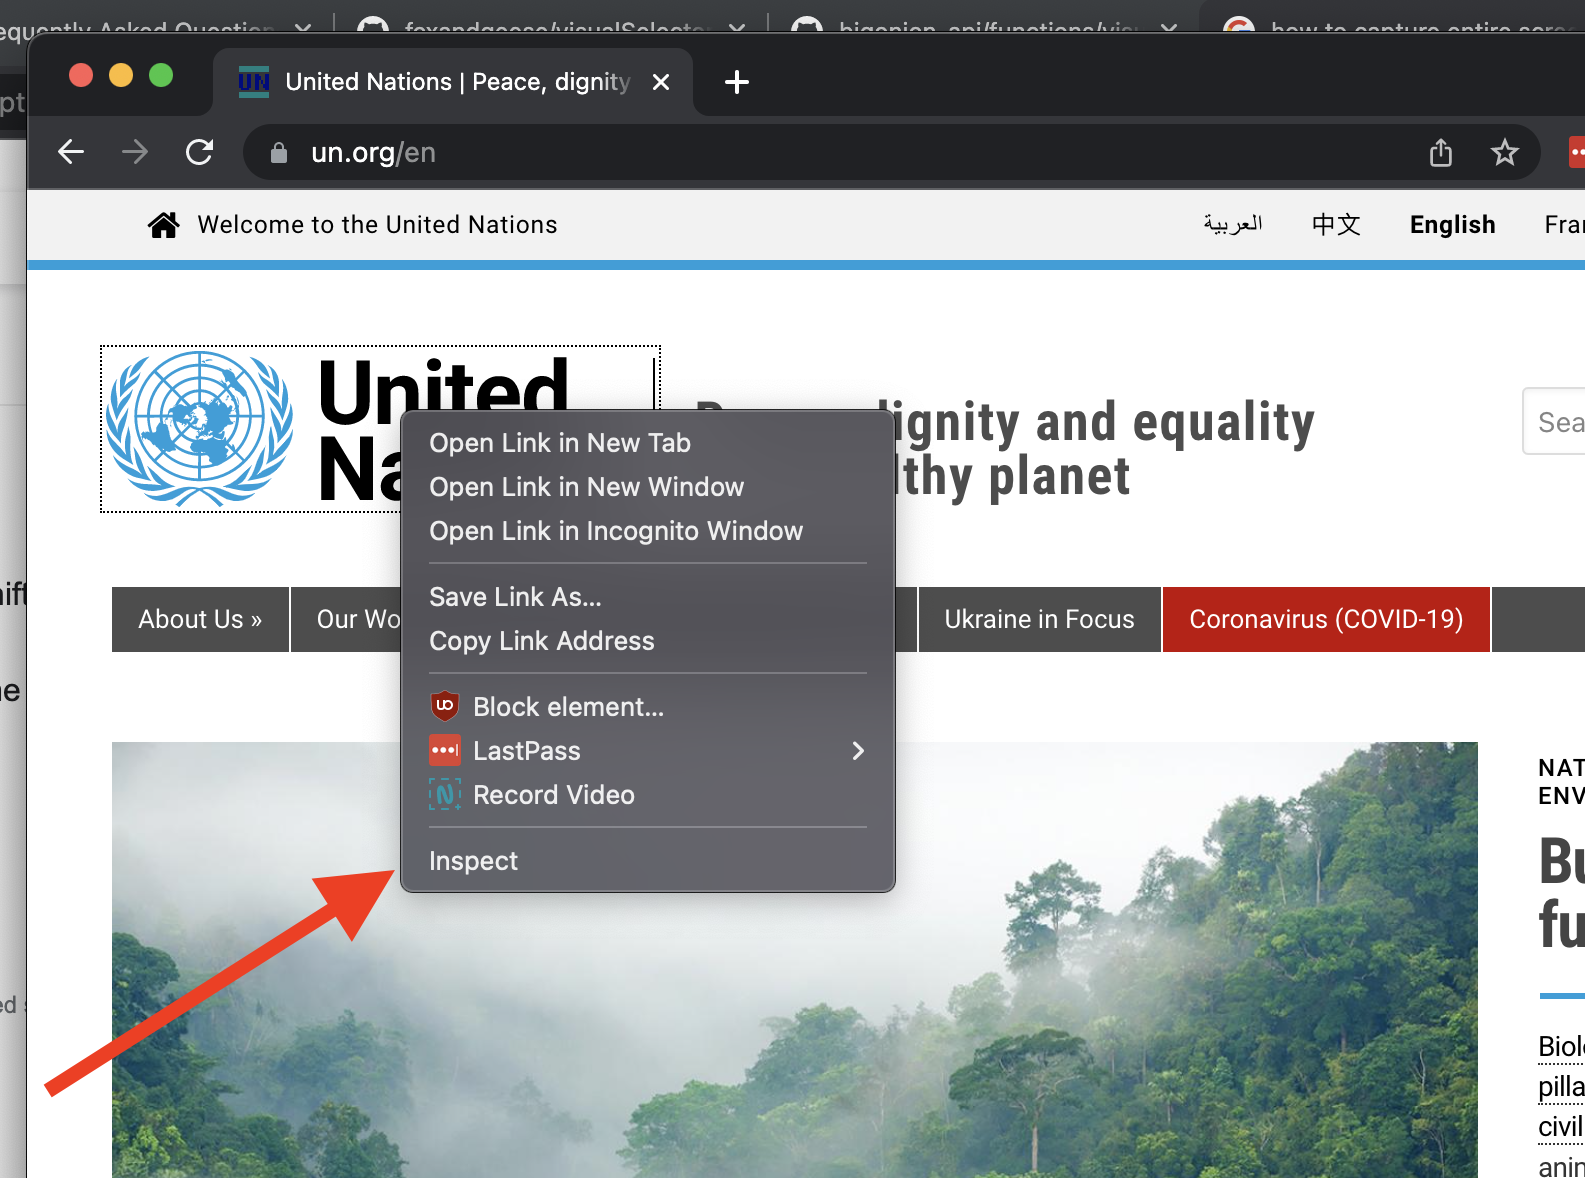
- Right-click on the area to filter and select “Inspect.”
- A code console will appear. Move your mouse up and down in this console. Notice that it highlights different sections of the page.
- Mouse up and down in the code console until you isolate the element you want to filter in the browser viewing part of the display.
- Right-click on the HTML element in the code console. Select “copy” and then “copy selector.” This will copy a lengthy selector identifying that particular DOM element.
- Paste it into the filter area. When the crawl occurs again, this area will be excluded (or exclusively included, depending on which filter you are using).
- Tips to keep in mind:
- When you use the above method, you may get a very long selector. As much as possible, try to reduce the selector to a minimal core. Try to eliminate any hierarchical elements in the selector. This is necessary to reduce brittleness. For example, if you have a selector that relies on multiple hiearchical and class elements (e.g.,
#navbar > div > div.navbar-header > a.logo.navbar-btn.pull-left.flip > img), then it will break easily if the site adjusts its layout or class structure even slightly. - You can paste a selector directly in Chrome’s Elements tab (the same one where you copied it from). When you do this, Chrome will tell you how many matches that selector has on the current page. Using this method, you can edit the selector down to a minimal core that still exclusively matches the areas you wish to filter.
- When you use the above method, you may get a very long selector. As much as possible, try to reduce the selector to a minimal core. Try to eliminate any hierarchical elements in the selector. This is necessary to reduce brittleness. For example, if you have a selector that relies on multiple hiearchical and class elements (e.g.,
7. Add an action for each form element
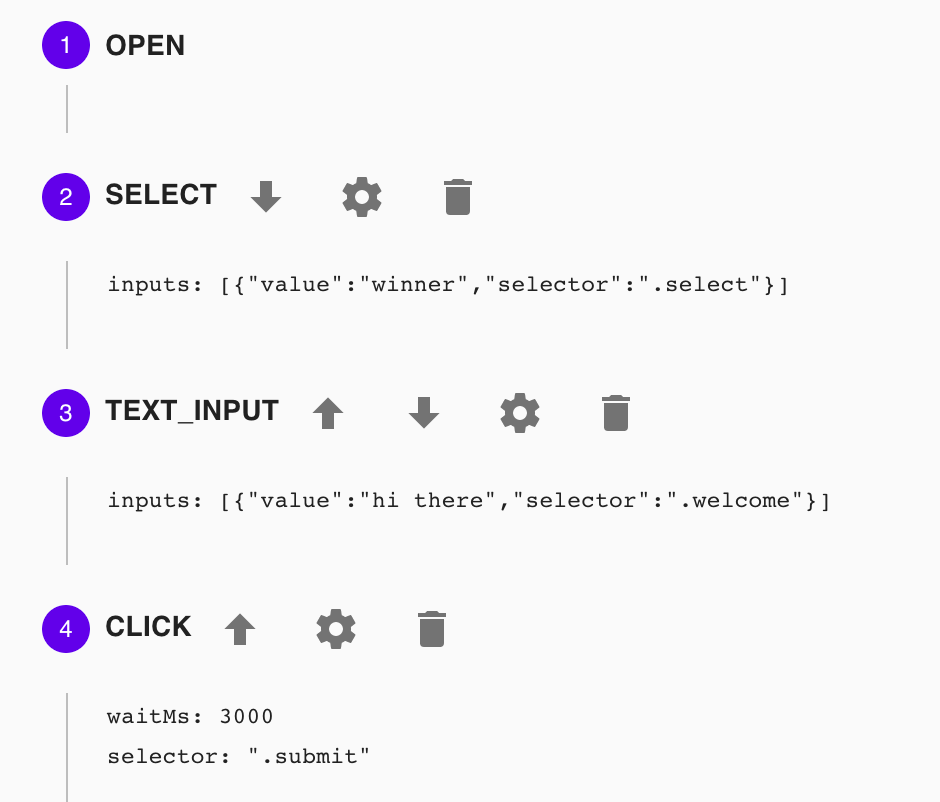
Add an action for each form element. The result should be a series of actions in Fluxguard such as this:
8. Verify the form works
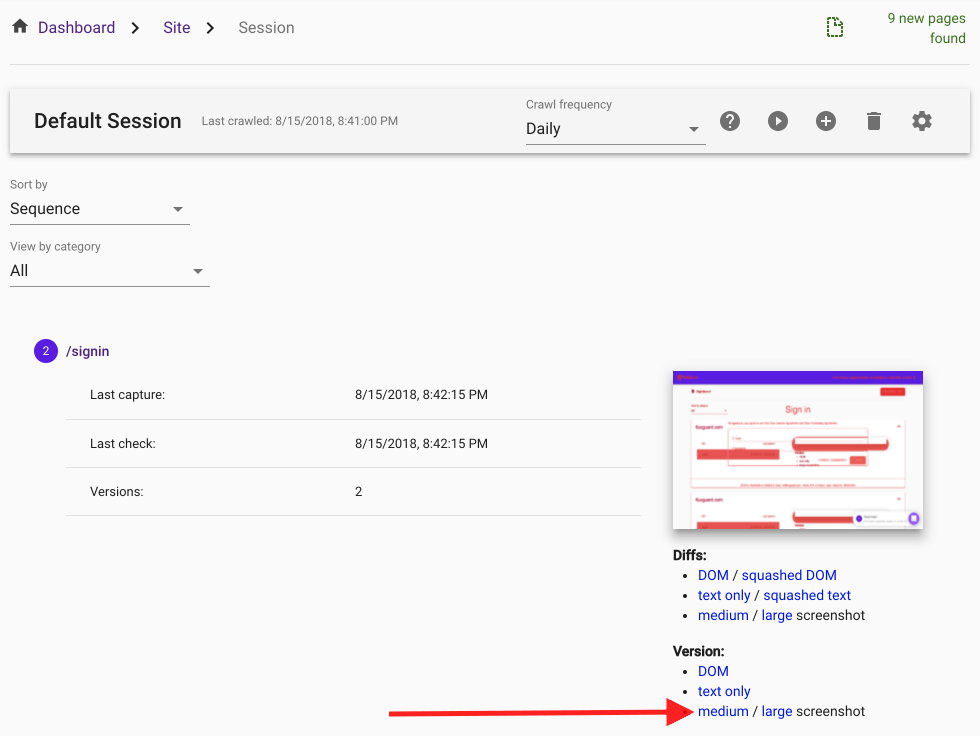
Go back to Session View and hit Play again to restart a crawl. Once crawled, a new thumbnail of the page will generate. Click the version screenshot to view a capture of the post-submission page.
9. You’re all set!
Any concerns? Reach out to us! We are here to help.
Need something more sophisticated? You can always insert and execute Javascript on any monitored page.

