Insert and Execute Javascript Recipes on a Monitored Page
Fluxguard is a platform for multi-page, multi-step orchestration. This allows our customers to monitor content that appears after complex browser interactions. Our product’s ability to insert and execute Javascript recipes on any page is a key feature that boosts this flexibility.
In this tutorial, learn how to insert Javascript recipes into any monitored web page before capturing. Execute Javascript to perform intricate tasks—such as completing complex forms—and transform content in ways suitable for your particular change monitoring needs.
1.Consider alternatives
Fluxguard supports directed actions that may be simpler. You can click any element, submit forms, and so on. Perhaps these can be utilized to accomplish your goals?
Of course, we don’t want to dissuade you! Fluxguard’s ability to insert and execute Javascript on any monitored page prior to capture offers untold flexibility. As a result, you can do almost anything in terms of manipulating the monitored content with Javascript.
2.Decide if you want to add Javascript at the account, session, or page level
You can add Javascript instructions in Session Settings which will execute on all monitored pages in a site.
You can also add Javascript in Account Settings. This will execute specific Javascript across every page of every monitored site. This is a great way to very quickly transform content from multiple pages across many sites in an instant.
In this tutorial, we explain how to insert Javascript at the page level. This will execute Javascript only on a single page.
3.Click into the Page View
Click into Page View. This is where you can add “actions” for Fluxguard to follow – such as clicks, form submissions, and more – whenever this page is crawled.
4.Click the Plus symbol to include a new action
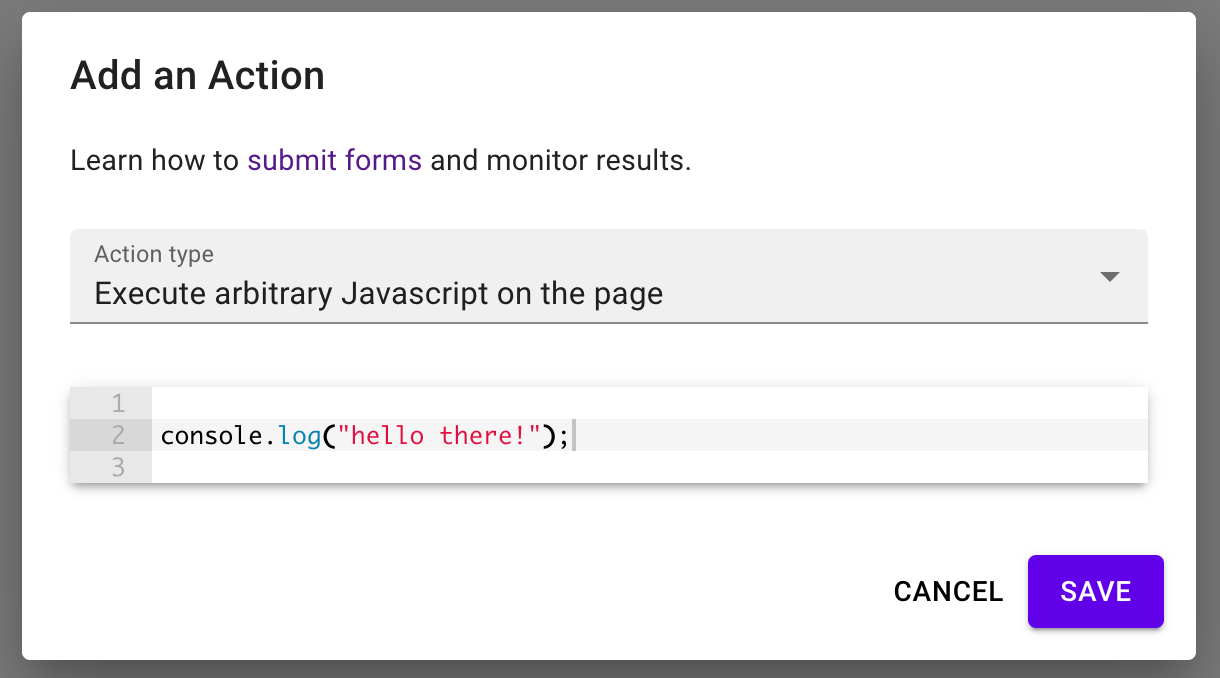
This will bring up a modal. Use the select menu to select the Insert Javascript action.
5.Get coding!
Start simple and verify that everything works. Perhaps add something such as:
document.open();

document.write("hello there");
6.View output
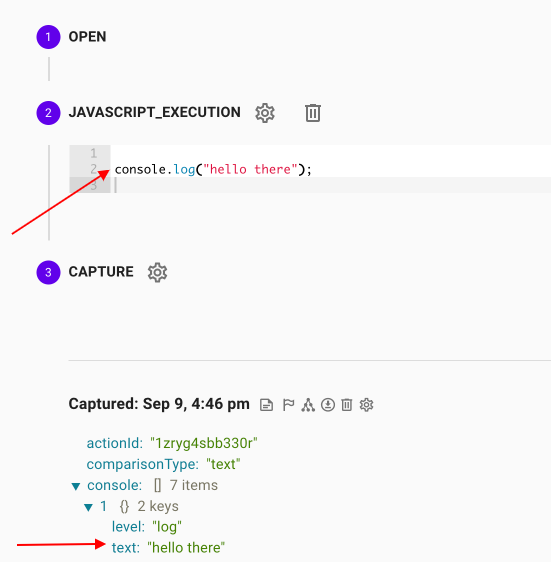
The above code will transform the entire page, so it will be pretty easy to view the output. But at the Page View, we list all captures. Here you can view console activity to view the output of, e.g., console.log("hello there");
7.Get creative!
Fluxguard is a platform for change monitoring and content analysis. Insertable Javascript offers a powerful way to transform monitored content:
- Fill in complex forms
- Count elements
- Pass data to the next page in a crawling session
- Pass data to the next crawl of the same page
- Manipulate the DOM or contents to transform it into a form suitable for change monitoring
- Remove attributes on DOM elements
- Re-order list elements alphabetically
- Change links to remove query strings
View advanced strategies and tips below, including techniques to send data to the next page in a crawling sequence, or the next crawl of the same page. This allows you to pre-process changes before sending to Fluxguard’s change engine.
8.Consider pre-packaged Javascript recipe templates
You will find a handful—with more on the way—of Javascript recipe templates. These are short scripts for common tasks—such as tracking rank changes of elements on a page—that our engineers have pre-created for your use. Follow the comments on each recipe template to customize.
9.Learn Fluxguard-specific Javascript syntax
Fluxguard provides multiple custom Javascript features to interact with our crawlers and data. Keep reading to learn more.
Fluxguard Special Javascript Syntax
Send Data to the Next Crawl of the Same Page
This powerful technique allows you to use data sent from the most recent crawl of the same page. This allows you to construct complex change monitoring strategies.
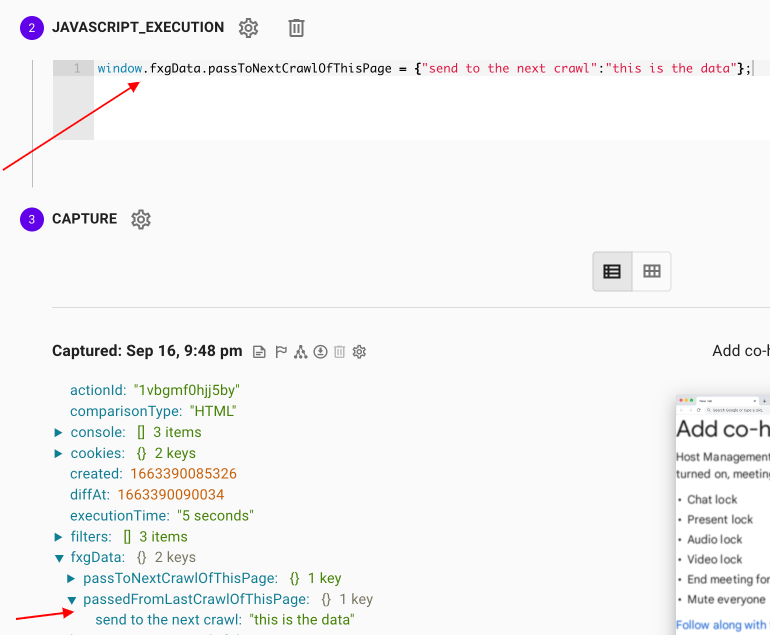
Use window.fxgData.passToNextCrawlOfThisPage and whatever you place here will be inserted into the next crawl of the SAME page. (No need to initialize window.fxgData... we do it for you.)
On the next crawl of the same page, you can then obtain this data using window.fxgData.passedFromLastCrawlOfThisPage
Fluxguard Special Javascript Syntax
Share Data Between Pages in a Crawling Session
You can send data from one page to the next page in a crawling session. This allows you to inform a subsequent pages with data from a previous page. Use this to better orchestrate complex monitoring scenarios.
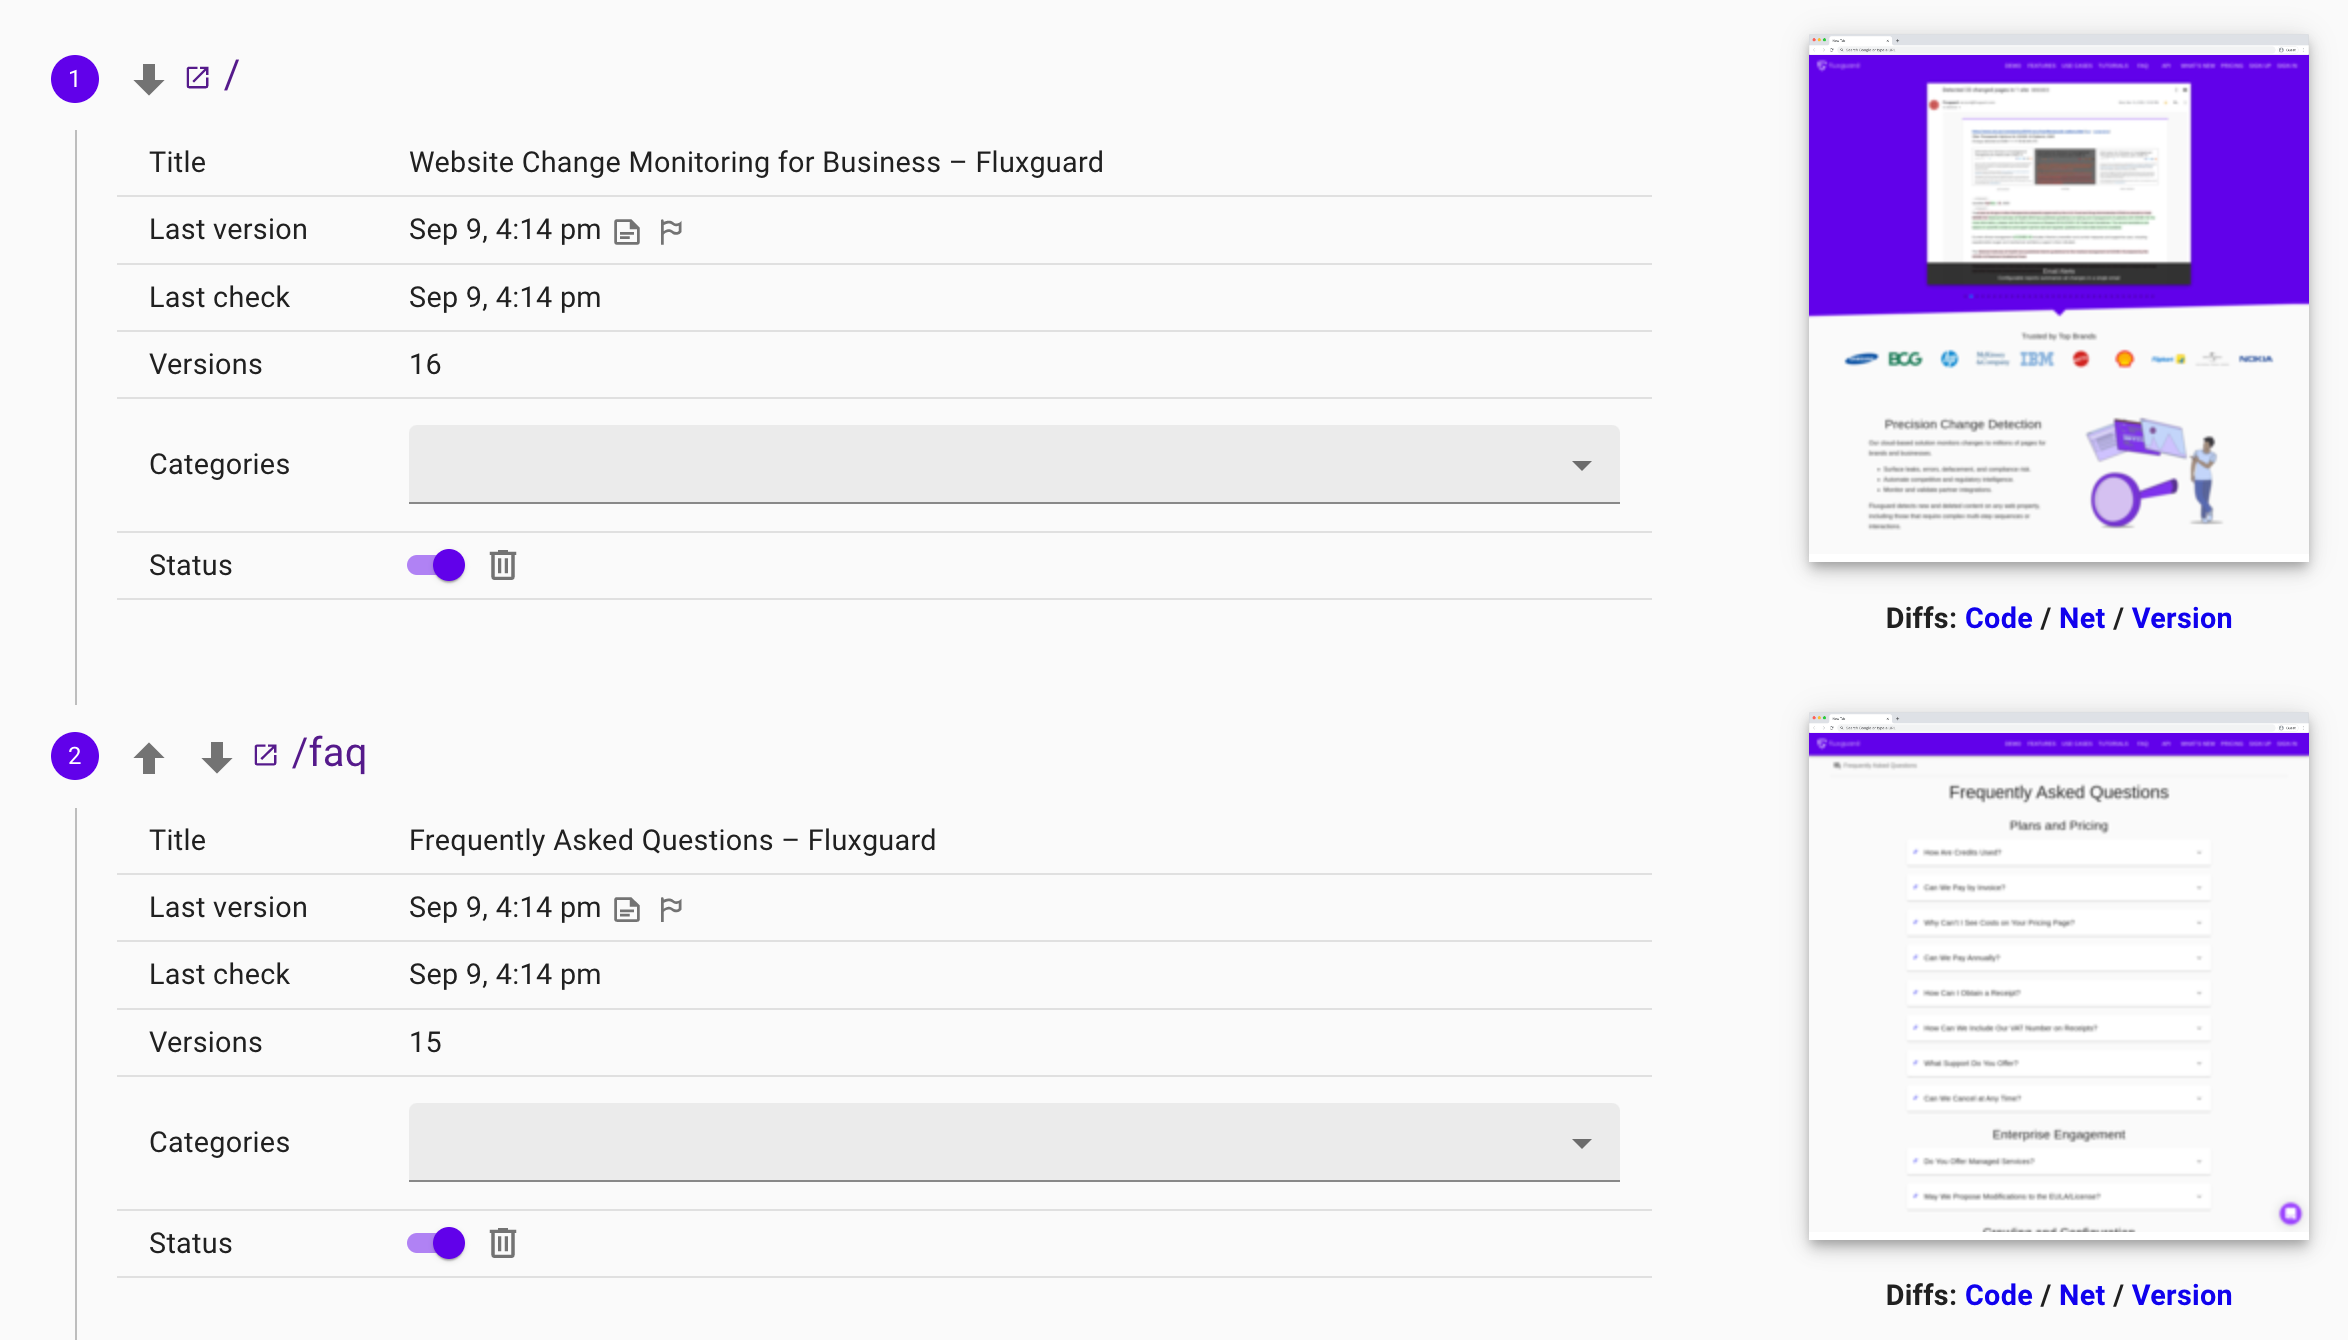
Let’s say you have two pages like this.
You want to send data obtained from the first page to the second page. How do you do it?
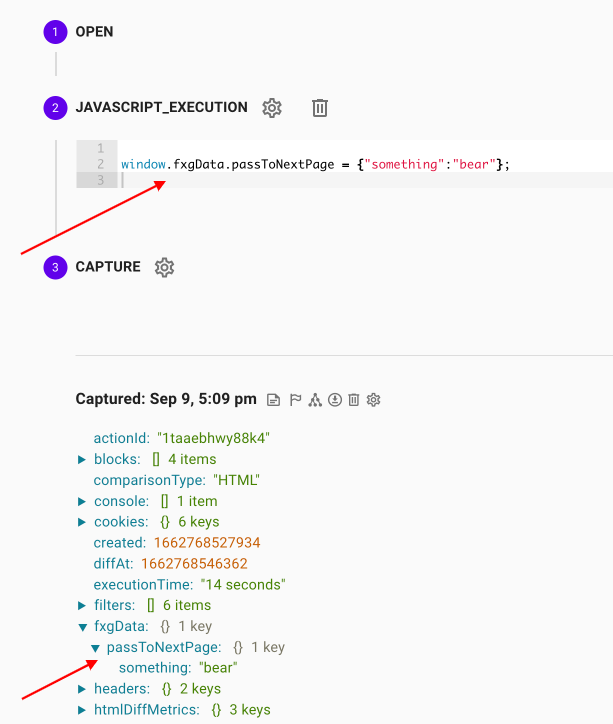
Use window.fxgData.passToNextPage and whatever you place here will be inserted into the next page in the crawling sequence. (No need to initialize window.fxgData... we do it for you.)
window.fxgData.passToNextPage = {"something": "bear"};
When you crawl this page, you will see an output to confirm the data is sent.
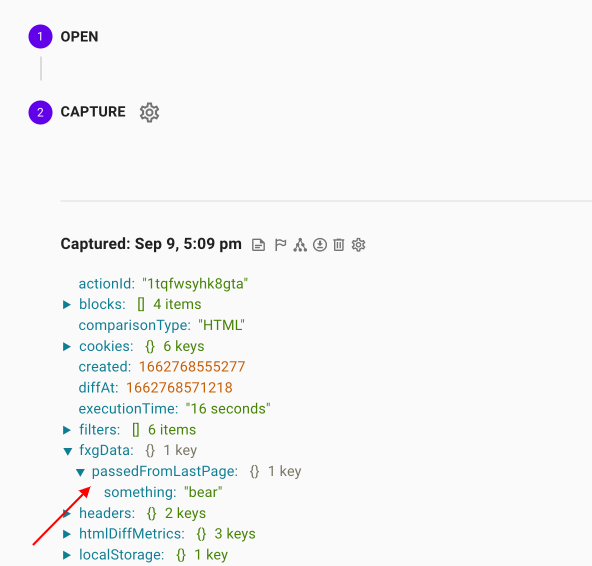
On the next page, you can then obtain this data using window.fxgData.passedFromLastPage
You can then choose to use this data in any Javascript inserted in this page. Keep passing the data to subsequent pages if you like.
Fluxguard Special Javascript Syntax
Alarms
Automatically trigger a new version of a page with the following code:
window.fxgData.alarms = [{"name": "My Alarm","value": "This is the value reported in email and dashboard."}];
This is a transformative capability in Fluxguard. With alarms, you can trigger a new version on any page. Insert Javascript tests to check for certain links or other content requirements beyond what Fluxguard can do natively... when it fails, trigger an alarm and Fluxguard will record a new version and send an email.
Content Validations—found in the Detect tab of Session Settings—provide pre-packaged methods to check for presence or absence of specific URLs, DOM elements, and so forth.
Fluxguard Special Javascript Syntax
Cookies, Security, and Network
Access all cookies, network requests, and security information about the https certificate used to connect to the web site.
console.log("cookies:", JSON.stringify(window.fxgData.cookies));
console.info("security:", JSON.stringify(window.fxgData.security));
console.info("requests:", JSON.stringify(window.fxgData.requests));
This is an advanced feature for use cases requiring review and monitoring of this information.
A more advanced variant of each of the above is to use the function window.fxgFetch. Running for example window.fxgFetch("requests") returns a promise for use with .then() and which yields live data from the browser. While fxgData.cookies returns the cookies at the time your code snippet begins execution, fxgFetch("cookies") yields the cookies at the time the function is run. This distinction is important if, for example, your JavaScript code execution changes the browser cookies.
Fluxguard Special Javascript Syntax
Reports
You can now create a report for a crawled page with Javascript. These reports will be monitored for changes and provide a powerful alternative to our regular text, HTML, visual, and other default change comparisons.
You can create a report for any crawled page. If a page has a report, the report will be checked for changes instead of other aspects of the page (such as text or visual differences). You can put anything in the report you wish.
Example:
This is an advanced feature serving very bespoke monitoring needs.
Fluxguard Special Javascript Syntax
Exports
You can export any data from a crawled page using Javascript. This powerful feature allows you to extract specific data—such as DOM element text, the number of items on a page, the rank of an item on a page—and receive it in Webhooks, CSV downloads, and the Fluxguard front-end.
Data can be assigned to window.fxgData.export. Exported data will be visible on the page view. However, unlike reports, it is not used in change detection. This feature can be used to record extra information about pages.
Exported data will be included in posted webhooks and Fluxguard front-end. It is also included in downloaded page and version spreadsheets.
Fluxguard Special Javascript Syntax
Call Fluxguard AI From Inserted Javascript
You can call Fluxguard AI to analyze any text from Javascript executed on a page. Credit costs apply.
The function window.fxgToAI is your interface to Fluxguard AI. It takes an argument with a ChatGPT query, and an optional second argument specifying what model to use. It returns a promise which must be used with .then() to process the results.
A ChatGPT query consists of an array of messages. See a description here. Each element of the array should be an object with a role attribute, which is system, assistant, or user; and a content attribute containing the text.
You can choose which GPT model to use, with the larger ones having greater cost:gpt-3.5-turbo (3 credits), gpt-4 (10 credits). The default if none is specified is gpt-4.
Example:
Fluxguard Special Javascript Syntax
Trusted Events: Automate Browser Form Submission
The function window.fxgPopulateData puts text into form fields via browser-level trusted events. This allows you to easily fill out forms within your code. Unlike regular Javascript DOM functions, it uses the browser to “type” into the form, since as a security measure some websites do not allow form fields to be set from scripts.
fxgPopulateData takes as an argument an object where each key is a CSS selector, and the corresponding value is the text to put into the field. It returns a promise which can be used with .then() for follow-up actions after the entry is complete.
Example:
Tips
- You may wish to add more time after Javascript execution to ensure all activity is completed. To do this, you can adjust “Wait Before Capturing” in Session Settings, or add a Wait action at the page level. This will briefly delay capturing of the page for a configurable number of seconds. This can be useful if you are inserting Javascript to interact with a slow-moving carousel, for example.

